


20 Common Photography Mistakes (And How To Avoid Them)
- WildWillowWays

- Mar 1, 2021
- 14 min read
Updated: Jun 23, 2021
As a new photographer I made many mistakes. Some of these were easy to fix while others are mistakes that I still make from time to time. I believe that what is most important is your attitude to mistakes. Do you use them as learning opportunities or as excuses to convince yourself that you will never make it as a photographer? Seeing mistakes as learning opportunities, analyzing them and finding ways to fix them, will help you grow as a photographer and improve the images you take. Like any skill worth learning, photography takes time to master. You have to constantly work on improving your photography skills. Making mistakes is part of this process; learning from these mistakes is what will make the difference to your photography.
Here are 20 common mistakes made by beginner photographers and how to avoid them.
1. Forgetting to take an extra battery. One of the advantages of using a camera over a mobile phone is that we are not using battery except for our photos. That said, it is surprising how quickly a battery can run down when we spend a day shooting, so what we don’t want is to run out of battery during our shoot only to discover that we have forgotten the spare. I learned this lesson the hard way. I was on holiday in beautiful Lake Garda. I had my camera with me during the day, and took lots of shots, then headed out again in the evening to watch the amazing sunset which had become a daily highlight of my trip. On this evening it was particularly spectacular, with the sky showing a beautiful array of colours, turning from the deep blue of day, to deep pink, purple and into vibrant orange as the sun set. I was only a few shots into this unique performance of nature when I realised what is every photographer’s nightmare – I had run out of battery and the spare was on the charger in my hotel room! Thankfully, I managed to get some shots with my phone, but I do feel that I missed a unique photo opportunity by not paying attention to this fundamental requirement.
TIP: Always keep a spare battery with you.

2. Realising your memory card is full when out shooting. This can be annoying especially when you have everything lined up to take those special photos and you get a message telling you that your memory card is full. And what makes it worse is if you haven’t backed up all the photos already on the card, so re-formatting on the go may not be an option.
TIP: A good idea to avoid this issue is to upload your photos after every shoot and regularly re-format your memory card. I find that having two cards with less space is preferable to having one large card. That way I can keep a spare memory card in my camera bag for emergencies.
3. Not knowing your equipment well. This can apply to camera or lenses, or any part of your equipment which you need to be sufficiently familiar with to use on the go. As a beginner photographer I was delighted to move on from my kit lens and purchased a 50mm fixed lens. I had my camera at a family function, practising in a real setting, when I was asked to take a group photo. Imagine my embarrassment when I discovered that I was too close to get everyone into the frame with my 50mm lens and had to admit that I was rather an amateur before asking the group to bear with me while I changed lens! I was grateful to go back to my familiar kit lens!
TIP: Get to know your equipment inside out. Read the manual, study the camera settings, get to know everything you need to know so that when you are out shooting you can concentrate on composing your shots rather than worrying about camera settings or which lens is right for the job.
4. Poor composition. I regularly made this mistake when starting photography. I would arrive at a scene, see the beautiful view in front of me, and take a shot. Most of the time I was including far too much in the frame and the viewer had no idea what to look at. Nothing stood out in those images; they were just snapshots. Maybe nice snapshots, but snapshots all the same. On other occasions I would run into the opposite problem. I would include too little in the frame, also resulting in an uninteresting image. And I won’t mention all those pictures with slanting horizons! Composition is everything in photography so if we want to improve at photography we have to improve at composition.
TIP: Take some lessons in composition, watch some videos, look at the work of other photographers, read about composition ‘rules’ and put them into practice. Poor composition is a mistake anyone can make when starting out in photography, but it can be improved, and this is something worth spending time on.

When I started in photography all my horizon lines were in the centre of the frame, splitting the image in half. Then I learned that having the horizon a third of the way from either the top or the bottom made for a more pleasing image. Most often I go for one third sky but in this image I liked the way the colours crept up into the sky so leaving two thirds sky seemed
best. One of the joys of photography is getting to experiment with what works best for us.
5. Not varying your images. When I started photography most of my images were landscapes. Granted, I did go to different locations to get some variations in my images, but they were still mostly landscapes. And because I was not experienced and didn’t have proper equipment for landscape photography, they were not particularly good landscape images. When I realised this, I began to vary my images. I went out into the streets and did some street photography; I tried out flower photography and nature photography where more close-up shots were acceptable. I began following my instincts and photographing things that drew me. I experimented with aperture, giving a different depth of field to some images. Now I vary my images and the photography journey has become much more exciting.
TIP: Don’t stick to the same type of images all the time. Even if a particular genre of photography doesn’t appeal to you, try it out, you might be pleasantly surprised. I was.

Street photography was not my favourite type of photography - until I tried it!
6. Expecting new ‘gear’ to make you a better photographer. I have indeed been guilty of falling for the lure of ‘Gear Acquisition Syndrome’. ‘Maybe if I had a better camera, I would get better shots,’ ‘None of my lenses are quite right, I need a new one.’ Is this your view? It is the view of many people starting photography. We don’t want to start off with the most expensive equipment as we may not keep up the pursuit, then we start to blame the inferior camera or lenses for what we think are poor images. I have had to change my view as I came to realise that my camera can take perfectly good shots; it’s the person taking the shots who needs to improve! This fact was brought home forcibly when I read that Ansel Adams, arguably one of the world’s best photographers, had equipment which was inferior to anything we have today, yet he was able to produce amazing images. The lesson I learned was to concentrate on improving myself as photographer and on getting to know my current equipment well before I go out and buy more ‘gear’, because no camera or lens will make me a good photographer. Granted, there may come a time when you are good enough to want better gear because better equipment will help you improve your photography even further. Until then, stick with the gear you have and improve your skills.
TIP: Use the gear you currently have, get to know it so well that it helps you make good images. Only then, when you have truly outgrown your equipment because it is preventing you taking your photography to the next level, should you invest in something new.
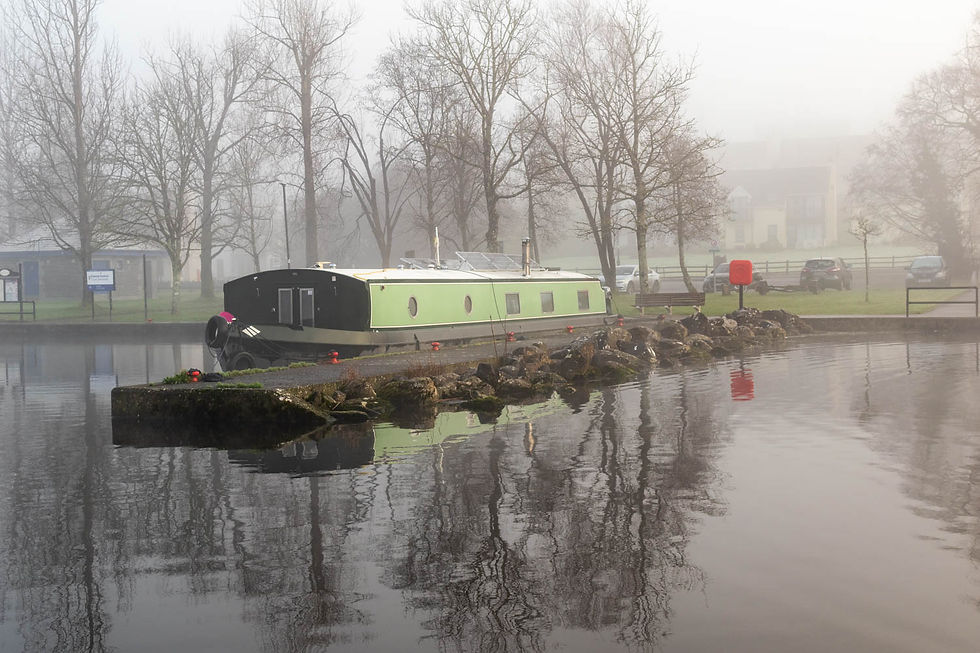
7.Not ‘working the scene’. There are two phrases often used to describe approaches to photography. One describes the ‘spray-and-pray’ type of photographer, the one who takes lots and lots of photographs in the hope that some of them will turn out well. The other approach is the ‘one-and-done’ approach, which involves arriving at the scene, taking the shot and leaving. Neither of these approaches will give you the best chance of capturing a good image. A better approach is to ‘work the scene’. This would involve taking a few initial shots, then taking more shots from several different angles and perspectives, perhaps waiting for light to change and taking more shots. You might make some close-up images, vary the depth of field, look around for a more interesting viewpoint. The point is, you will be actively involved in making decisions, looking for optimal conditions, making rather than just taking your shots.
TIP: Get into the habit of working the scene. Take several shots in each location, from different perspectives, levels and viewpoints. Maybe none of them will be the image you were hoping for, but if you cover all bases you might just get an image to be proud of.
(Slideshow)


I took these three images in my local park, from different angles and perspectives.
8. Not taking advantage of all the camera has to offer. I have to admit, I stayed on Auto mode for quite some time after getting my new camera. All the while I knew that, while the camera did a decent enough job, I wasn’t really developing as a photographer or capturing the kind of images which a DSLR is capable of capturing. I gradually made the move to Program mode, then to Aperture Priority, before taking the plunge and tackling fully manual. I do have more creative control over my images, but I know that there is much about my camera that I have yet to learn. It has a menu packed with features and options which are available for good reason and I do a dis-service to my photography by ignoring them.
TIP: Spend some time investigating the camera menu, reading the manual and getting to grips with the controls. An experienced photographer once said that we can become creative photographers only when we know our camera so well that it doesn’t get in our way. I am not at that stage yet, so I need to take my own advice here and spend some time investigating all that the camera has to offer.
9. Taking Out of Focus images. Images end up out of focus for a number of reasons. One reason can be camera shake, which can result in a blurred image, while another reason is failure to focus on the right spot. A mistake I have made, which has resulted in disappointingly blurred parts of my image, has been using the wrong shutter speed when there is movement in the frame.
TIP: Having photos that are in focus is key to becoming a good photographer, so it is important to learn how to use the auto focus settings on your camera and to practise manual focusing. Choosing a single point auto focus, rather than multi-point, can help you take sharper photos. When using a phone camera or a camera with touchscreen, don’t forget to set focus before taking the picture rather than relying on the camera to get the focus right.

In this image the feet are out of focus due to the fact that I didn't get the shutter speed correct.
10. Taking all photos from the viewpoint of a standing adult. This is a common mistake of many photographers, not just beginners. Using a tripod, while necessary to avoid camera shake, can often contribute to this problem. It appears to be the most natural position from which to capture our shots, but if we want to make more creative images it is important to explore different angles and perspectives. We can try shooting upwards, crouching down and getting a worm’s eye view, stepping up on something and shooting down from above. These approaches will give a more interesting look to our images and, particularly if we are practising photography as amateurs, will help us to develop our photographer’s eye.
TIP: Next time you are out shooting, try at least one new perspective. Doing this regularly will bring your photography to a whole new level.

Shooting upwards can give us a perspective we don't normally see
11. Thinking there’s nothing to shoot. You have been to all your local locations, you have been to the places you know are popular for photography, you have scouted for new locations and you feel you have nowhere left to go. This can be a problem for all beginners in photography, but the good news is, there is always somewhere to go, something new to shoot, a fresh approach to take, a new perspective to try even in a familiar location. Instead of a wide-angled landscape shot, we can try a close-up; instead of shooting in a rural area we can attempt urban photography, or vice versa. We can try seascapes or cloudscapes. We can try architectural photography. We can even concentrate on creating a portfolio of shots of one subject such as trees or doors. In fact, even though I thought many times that I had nothing left to photograph, I continually realise that the only limit to the images I can make is my imagination.
TIP: When you feel like there is nothing left to photograph, look online, read a photography book, join a photography group, search your imagination for ideas and they will come. There are endless possibilities for making photographs, we just have to be open to finding them.

12. Not turning around when shooting. Most times when we are out shooting, we keep going forward, looking for photo opportunities to present themselves. Then we turn around and see what we could have missed.
TIP: Make a point of turning around regularly when out shooting, then you won’t miss that great opportunity that has opened out behind you.
13. Not sharing your images. You spend hours out shooting, you have several shots that you like, but you don’t do anything with them only upload them to your computer and leave them there. Take the opportunity to show your images to the world – post on family or friend group sites, social media sites, or create your own portfolio website and invite visitors. Part of the joy of photography is allowing others to view our creations. Don’t miss out on that side of this amazing hobby. If you do, you may be denying yourself another opportunity to develop as a photographer.
TIP: Choose at least one platform or photo sharing site and share some of your favourite photos or join an online or face to face photography group where photo sharing is encouraged. There are lots available.
14. Image is over or under exposed. This is a mistake that I regularly made when starting out in photography. The problem was that I didn’t fully understand the exposure triangle, the relationship between ISO, shutter speed and aperture. I won’t say that I always get exposure right, even today, but it is something that I can continue to perfect. TIP: It is worth spending time learning how to get the proper exposure in our shots. Take some time to learn about light and the role which light plays in creating an image. Learn about ISO, Aperture and Shutter Speed, which are the foundations of photographic exposure. There are many online tutorials which explain this concept well, it is the basis of every beginner photography course and you will find an explanation of exposure in most photography books. Personally, I found that it was helpful to study the concept from many different sources.
15. Unsightly objects in the picture. There are more photographs being taken now than in any time in history, mainly because most adults always have a camera in their pocket. Unfortunately, though, more photographs do not mean better photographs and many people do not pay attention to what they include in the frame when taking photographs with their mobile phones. Often, we end up receiving images that would have looked good except for the tree sticking out of someone’s head, a pole spoiling the beauty of an otherwise natural landscape or a piece of litter looming large in the foreground of our scene. Unwanted objects on the edges of the frame can also spoil our picture. Fortunately, these issues are easy to remedy with a bit of care and attention. TIP: Always pay attention to what is going on in the frame. If necessary, take a few steps to one side, or pan sideways with your camera, to remove an unwanted object. Getting the picture right in camera can avoid a few embarrassing moments later.
16. Photos are not very interesting. This point relates in some ways to point #10. Often, the most uninteresting photos are the ones we take from the standing adult viewpoint. Changing our perspective, shooting from a higher or lower vantage point can pay dividends here, as outlined in point #10. Sometimes, though, it is the subject itself which is not so interesting. Making an image which is of interest to ourselves and to our viewers is at the heart of photography.
TIP: A good idea is to study the work of photographers you admire. What is it about their photographs that appeals to you? How do they compose their images that make them interesting? Doing this will not only help you understand what it is in images that appeals to you, but it will also be of benefit in creating more interesting images of your own.

An empty beach may not be very interesting but by getting down low we can add a little more interest to the shot.

17. Over-doing post processing. It can be tempting to keep working on a photo in a post processing, but we must know when to stop. It is particularly easy to over-do saturation, leaving the colours looking unnatural. It is suggested that 80 per cent of the look you want should already be in the image.
TIP: I find that it is a good idea to work on a photo for an initial period then leave it and come back later. It is usually easier to see whether we like our post processing when we return afresh.
18. Not doing any post processing. Most, if not all, photos need a small amount of processing to make them look more pleasing to the viewer. While today’s cameras are very capable, no camera can capture that same range of light that our eyes can handle. By making small adjustments to exposure and white balance, for example, we can produce images which are closer to that which our eye sees. We are attempting to produce images that are the best they can be.
TIP: It is worth doing at least a small amount of editing on your images before posting them publicly. Even very basic edits on your phone can make a difference to your images and you may want to progress to a more advanced mobile editing program such as Snapseed. When you become more familiar with what you want to do you might try Lightroom or Photoshop.
19. Not learning from your mistakes. We must realise that we all make mistakes in photography. Whether we are beginners or have been doing photography for years there will still be things we won’t get right from time to time, and that’s par for the course. What we can do, however, is learn from these mistakes so that we will make them less often.
TIP: When your image is less pleasing than you would have wished, take some time to analyze it closely to see what went wrong. Do you have a clearly defined subject? Is the image in focus? Is it over or under exposed? What about the composition – have you applied some of the composition ‘rules’ to your image? By evaluating your image you will begin to name your mistakes and take steps to avoid these next time.
20. Not taking time to enjoy what you are doing. We all like to come home from a day’s shooting with some worthwhile images, and if we follow some of the suggestions here we are likely to do that, at least some of the time. But photography is not all about getting perfect images. It is as much about enjoyment of our time out shooting; it is about being present in the moments, appreciating our surroundings and enjoying discovery and learning with our camera. Of all the mistakes you make as a beginner in photography, not taking the time to enjoy the process might be the one that will result in you getting disillusioned most quickly. So whatever else you do with your photography, be sure to enjoy it!
Can you add to this list of mistakes?

This might not be a great image, but I did enjoy experimenting with my new iPhone camera.


I really resonated with your point about viewing mistakes as learning opportunities rather than excuses. That mindset shift is truly crucial for growth in any skill, especially photography. Forgetting a spare battery, as you mentioned, is a classic, but understanding *why* a shot didn't turn out as planned often requires a deeper look beyond just composition or light. Sometimes, it's about the technical settings used. For photographers looking to analyze their shots more deeply and understand the precise camera settings and other details embedded in their images, exploring photo metadata and camera settings can be incredibly insightful.